Something went wrong. Try again later

Praxis

This user has not updated recently.

278 241138 70 70
Forum Posts Wiki Points Following Followers

Doom Travelogues 10: DoomRL

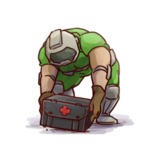
In the absence of a QuakeRL, I suppose this cameo will have to do.

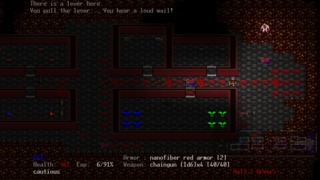
I can’t really tell you when I first came to be aware of Kornel Kisielewicz’s Doom, the Roguelike. It most certainly wasn’t in 2002, when the initial version was released, but it was definitely prior to the addition of Derek Yu’s non-ASCII graphics in 2012. Somewhere in that ten year window. Not that it matters. More to the point I haven’t had a strong desire to play it until about a week ago. I do remember twiddling around with the graphical version a couple years back, the briefest of dalliances which I think lasted all of about an hour, if that, but until recently I hadn’t devoted any serious time to it. Which I guess is weird. I mean, sure, I haven’t played any roguelikes before (and precious little of the increasingly nebulously-defined genre inspired by them, for that matter), but I like RPGs, and some of my favorite games are turn-based. Still, like an electric blanket in a rain storm, I’ve avoided roguelikes, or at least haven’t gone out of my way to play any. But if ever there was a gateway into that world tailor-made for me, DoomRL is it.

For those unawares, DoomRL is a tile-based, turn-based, no-savin’, no-foolin’ RPG (i.e., a roguelike) that mirrors the basic arc of pre-Ultimate Doom, in that there are three distinct chapters (Phobos, Deimos, Hell), each capped with a boss fight and some brief congratulatory text (if you win, natch). In this case, they’re presented contiguously, as a single 24-level dungeon, rather than episodically. There are eight levels in each “episode,” with the first seven being randomly-generated affairs, and the last a not-so-randomly-generated boss arena. In addition, there are a number of red staircases to be found that lead not to the next level of the dungeon but to optional side areas that will dump you back into the main dungeon once you’ve completed them. These side areas are typically tough challenges that are fixed rather than random (though there are exceptions), and more often than not they are interpretations of actual Doom levels.
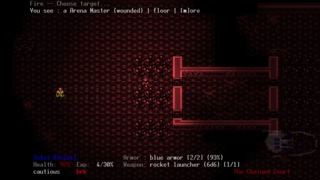
Beating Hell's Arena gives you some much-needed equipment early on, but also goads the Arena Master into confronting you later.

Like most RPGs, there are different character classes to choose from, though the choices here are less important than in other games. Everyone has access to the same guns and items, so your selection largely affects your starting perks and which advanced trait you can invest in without prerequisites. For my money, the Technician’s early access to Whizkid, which increases weapon modability, is hard to beat, but there really isn’t a wrong answer. You gain a trait point every level, and most traits are available to all classes. Each class has five unique “master” traits, but they cover similar specializations regardless of class (melee attacks, burst weaponry, etc.), and furthermore master traits have such specific requisites that they’re not likely to be used that often anyway. To compare it to another well-established RPG I barely understand, DoomRL’s classes are reminiscent of D&D’s character kits in that they feel like three slight variations on one class. I have to say, though, I was pretty impressed that Kisielowicz found a way to graft the standard fighter/mage/thief archetypes onto Doom in a way that doesn’t not make sense.

The main difference between DoomRL and other roguelikes, or at least what I imagine to be the main difference in the absence of any meaningful credentials in the genre, is its heavy focus on ranged combat. Melee combat is an option, of course. There are combat knives and chainsaws to facilitate this, and I’m pretty sure you could use your fists too if you really wanted to, but there’s no immediately compelling reason to do so. Enemies can fire on you the moment they see you, and will have more opportunities to harm you if you try to close the gap rather than just blasting them. In the earlier parts of the game acquiring weapons is your first order of business, a task only slightly eclipsed by staying alive. Making sure you have a well-rounded suite of armaments at your disposal is as important to success as picking the right character traits when levelling or making sure you have enough health kits and armor to take hits and keep on going.
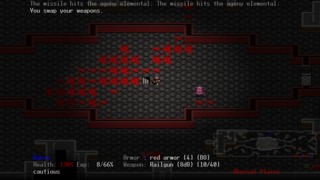
This purple pain elemental may or may not generate additional pain elementals. On a related note, fuck that guy.

The game also features a rather extensive crafting system. As you explore you’ll come across various mod pick-ups that can be fitted into weapons and armor, thus augmenting them in one way or another. Some of these offer handy but not exactly jaw-dropping benefits, like increased accuracy or reload speed, while others are pretty dramatic. With the right mod, for instance, you can make your plasma rifle regenerate ammo or your combat armor indestructible. In addition, specific combinations of mods applied to specific items can transform the base item into one of a special class of equipment called assemblies. The game doesn’t explain how to make any of these up front, though it does keep track of the ones you’ve made, so you’ll just have to get out there and experiment. This is why I mentioned the Technician class earlier as being particularly strong. Whizkid, which allows you to mess around with mods more liberally, is available to all classes, but the Technician can get it right away, giving him lots of time to make powerful equipment. Of course, Whizkid doesn’t actively make you stronger the way that most traits do, but the potential rewards are worth it.

Once I’d wrapped my head around the game I was actually quite pleased at how similar to Doom it manages to be. For a turn-based game the combat is surprisingly punchy. Targets that were squishy in the original game are squishy here, too, so unloading a double-barreled shotgun into a crowd of zombies is apt to take all of them out. Even tougher foes like barons and mancubi go down pretty fast with the right weapons. Doom’s emphasis on player mobility makes the transition as well, which I certainly approve of. Projectile attacks can be effectively strafed and juking out of the way of an incoming lost soul is not out of the question either. As in Doom, ammo management can be very important to success, although in DoomRL’s case it’s mostly due to the fact that ammunition has to fight with everything else for a spot in your inventory. All the classic Doom enemies and power-ups are here, save for the spectre, and the combination of Derek Yu’s artwork, id’s sound effects, and some remixed Doom tracks helps set the tone.
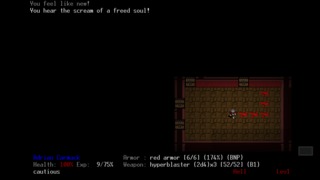
If you walk through a pool of blood, you'll track it around for a while, and this effect will even persist between levels. Neat.

I originally tried the game out on Hurt Me Plenty, since higher difficulties have to be unlocked by achieving specific milestones. After about thirty attempts with varying degrees of success I switched over to Hey, Not Too Rough and promptly beat the game on my third try. In retrospect, HNTR is clearly the baseline difficulty and the way in which you’re meant to familiarize yourself with DoomRL in preparation for higher difficulties. The challenge ramps up far more gradually than HMP, to the point where, at times, I was having to discard health packs, something I can’t recall doing previously. Both of my deaths in HNTR felt like the direct result of my own stupidity, whereas many of my deaths in HMP seemed to result from bad readings on the rand-o-meter. But that’s the appeal, I guess, being savvy enough and having built up enough of a buffer that you can survive even the most heinous random encounters the game can throw at you. I guess I was just surprised that HNTR never hits below the belt when HMP does so with gusto.

So in short, I really enjoyed DoomRL, and would not be opposed to playing more of it in the future. According to the player info screen, I achieved the “standard” ending as opposed to the “full” ending, which implies some sort of optional boss encounter I have yet to discover. I also skipped some of the side areas and avoided using a lot of the weirder items I encountered for fear of prematurely ending my run, so there’s a lot of stuff left to explore, and less pressure now that I’ve cleared it once. Then there’s the challenge mode that I have yet to look into. Between all the item customization, the dungeon randomization, and the higher difficulties, it seems like a game with a lot of longevity to it, and one that I’m glad I gave another go. It manages to earn its appropriation of the Doom franchise instead of simply using it for nostalgia’s sake. Consider me officially intrigued to see what happens with Jupiter Hell, the potentially-Kickstarter-funded commercial spiritual sequel to DoomRL (and also AliensRL) that Kisielowicz has been teasing since last year.
Start the Conversation

Doom Travelogues 09: Deus Vult

2004 was a pretty solid year for Doom WADs, which is not exactly a surprising development given the state of things. With years of mapmaking experience to draw from, design sensibilities were, by and large, pretty sophisticated by this point in time, and many authors were producing levels one might call professional… if one was inclined to use such words to describe hobbyist pursuits. Furthermore, the source code had been freely available for over half a decade, allowing most of the baked-in limitations of the engine to be broken or at the very least significantly curtailed. In other words, it was a good time to be making maps. You had, in one hand, the collective experience of ten years of WAD-making to guide you, and in the other advanced source ports that allowed you to make, more or less, whatever your heart desired. And in 2004, very few could lay claim to utilizing these two things quite as effectively as did Huy “Converted Doomer” Pham with Deus Vult. Though it is the author’s first map, it is a product that simply could not have existed without the years of effort that had already been poured into Doom.

Pham borrows architectural elements from Alien Vendetta's MAP29 in a few places.

It becomes abundantly clear even before playing the level that it is as much a product of the past as it is of the present. Pham lays out his inspiration for the map via the WAD’s text file, where he cites Hell Revealed and Alien Vendetta as his primary muses. As far as launching points go, you can’t get much better than these two WADs, but he also goes on to specifically praise MAP20 of Alien Vendetta, which, if you were to ask me right now to pick a favorite Doom map, would probably be my response. So clearly he is a man after my own heart, or rather one with similar tastes in his Doom maps. He also mentions B.P.R.D.’s nuts.wad, which was a tad more concerning to me, I’ll admit, since I’m not really a fan of the kitchen sink school of encounter design, but, without getting too far ahead of myself, that ended up being a false alarm. Deus Vult may resemble nuts.wad in terms of the sheer monster count, but, thankfully, the usage of said monsters bears little resemblance, if any (my apologies if you actually like nuts.wad).

The first thing to be aware of vis-à-vis Deus Vult is that it’s massive. Like, no foolin’, it’s really big. “How big?” you ask? Well, big enough that it comes in two varieties: the whole shebang, i.e., the entire, unbroken level, and the same thing split into four smaller (but still pretty substantial) chunks. Pham’s stated reason for this dual presentation is not only to ease the load on players who might not be accustomed to or inclined toward long, tough maps (the par time is almost two hours), but also to ease the load on low-end CPUs. These days the latter is not much of a problem, so there’s really no reason not to play the full version. The four-map variant actually plays basically the same, with some minor differences, but you miss out on the interconnectivity of the full version, and the second level break bisects a major encounter in a rather unfortunate way. Even if you don’t like long levels, you’re better off just playing the full level while using saves. Heck, you’ll probably be riding the save a fair amount either way.

Even demons need somewhere to be on Sunday morning, it would seem.

That’s because this is a very hard map. Combat emphasis is on, in Pham’s words, “large, well-choreographed fights.” No tricks. No sucker punches. Just you against a buttload of enemies in a variety of interesting configurations. Even early on, when you’re facing off against demons, spectres, and a few hell knights with naught but your fists and a chainsaw, it’s clear that monster usage (and item usage, for that matter) is very deliberate, and this attentiveness carries throughout the map. In fact, it’s probably the single most satisfying facet of Deus Vult. Thoughtfully-composed monster packs are par for the course, and you’ll never have to worry about boring filler fights. Enemies aren’t placed haphazardly or served up for an easy kill just to pad your ego. They’re there to present you with a choice: react properly or die horribly. Pham’s arch-vile usage epitomizes this. Starting about a quarter of the way through the level he begins mixing them in with normal monster packs as a way of both preventing player complacency and forcing target prioritization. Moreso than most maps, you’ll need to think about what needs to be killed in what order and which angle of attack is least likely to get you killed. Thankfully, there’s a lot of monster variety, so you can count on lots of infighting.

The level itself is sadly somewhat outshined by the encounters within it, though that’s not to say it looks bad. It looks quite good, in fact, but I could never really shake the sense that the level was designed around the encounters as opposed to the two being designed to support each other. It doesn’t help that the level starts out with a series of large boxish arenas that do a pretty poor job of hiding the fact that they exist for the sole purpose of filling up with monsters. Once you fall off a precipice and into Hell itself, things become a little less straightforward, but the biggest battles are still mostly fought in vast, obvious arenas where you’d have to be daft not to see fights coming a mile away. The various locales of Deus Vult are more combat venues than actual places, and it’s a little disappointing that the level design is so utilitarian. Plenty of levels have succeeded in being excellent architectural showpieces without sacrificing playability, so it’s too bad that Deus Vult doesn’t quite strike the same balance.

This tech base style didn't do much for me, but it doesn't last for very long, at least.

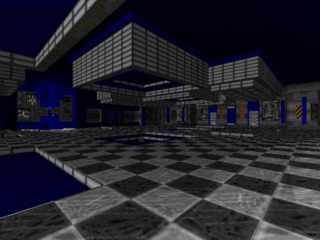
That said, it’s still an impressive beast if for no other reason than scale. If Deus Vult makes one thing clear, it’s that Pham isn’t afraid to play with large spaces. A yawning marble cathedral and a massive subterranean cave system are just a few of the venues you’ll visit, and unlike many such constructions, the extreme size isn’t just for show. It’s absolutely necessary in order to accommodate the suffocating monster hordes that Pham deals in. The overall theme of the level is a tech base being consumed by Hell. You know, that old chestnut. In this case, though, you come across the base in the middle of its subversion. At the outset the environs are clearly of human construction, but before long you’ll find that Hell has literally torn through the facility, leaving the larger part of the level to be fought on unholy ground. The map’s initial blue and checkered floor tech aesthetic is, frankly, not that good, but it is quickly forgotten once the demonic influence kicks in. There are a fair number of custom textures present, including some, let’s say, interesting iconography in the cathedral leg and a few draws from Peter Jackson’s Tolkien films which probably aren’t meant to be as funny as I found them. Perhaps it shouldn’t be surprising that Sauron and Satan are so simpatico. They have such similar interests, after all.

While the vastness and variety of the map is without a doubt one of its greatest strengths, I have to say I found the consistent variability of its combat even more astonishing. And by that I mean that a surprising amount of Deus Vult’s combat can be engaged to the degree of your choosing. There are of course battles that you can’t really get around, but on my first playthrough I was able to circumvent quite a few threats, and on my second I found myself aghast at just how much Pham lets you get away with. Several major encounters can be dodged with minimal fighting if you play your cards right. Sometimes this approach will come back to bite you in the ass, but for the most part it doesn’t. This is because there are a number of cutoff points in the level past which monsters can’t pursue you, and once you know they’re there it’s hard not to take advantage of them. There are also kind of a lot of invulnerability spheres on the map, and, again, once you know they’re there, they can be exploited in some interesting ways. Now, it could be argued that these things break the map’s difficulty, and it’s true that Deus Vult is less challenging than it seems at first. Whether you see these attributes as features or flaws is probably a matter of taste. For my part, it’s a bit of both. It’s an exhilarating moment when you discover that you can thread the needle through a sea of enemies without fighting anything, but that high is follow by a twinge of regret as you realize all those carefully-place monsters are now left to twist in the wind, groaning and shrieking in their own fecklessness.

Even if the architecture doesn’t pop as much as you might like and slippery play is rewarded more than perhaps it should, Deus Vult is an amazing map and without a doubt one of the greatest first maps ever produced. The best compliment I can pay Deus Vult is that it’s not really my kind of level, but I still like it quite a bit. The biggest danger in a large, monster-ridden map is combat fatigue, and it’s to Pham’s credit that that’s never really an issue here. Despite the near-constant fighting, things are always fresh, encounters are always interesting, and you’ll always want to see what he has in store for you next. You’ll never curse the author for throwing monsters at you just for the sake of it, because he never does. They’re all part of the plan. I’m still a long way from playing 2008 WADs, but I’m nevertheless greatly looking forward to playing Deus Vult 2, because if this is what Pham can accomplish without any prior mapmaking experience, his second outing ought to be something really special.

BONUS GAME! See if you can find where I am on this map within ten seconds! GO!!

Start the Conversation

Doom Travelogues 08: Hell Revealed 2, Part 3

Another week, another set of levels. Or in this case another subset of the same group of levels I’ve been playing for the past two. Let’s start that again. Hello and welcome to the third and final week of my in-depth look at Hell Revealed 2. Having now finished the damned thing I’m finally in a position to say something about the product as a whole. It is in fact… wait for it... a Doom WAD. Yup. Confirmed. You can all go home, now... Okay, I guess there’s slightly more to say about it than that. It’s a good WAD, I guess, I don’t know. In a lot of ways it’s the quintessential team-based megaWAD, which is to say that some levels in Hell Revealed 2 are legitimately pretty great, while others are legitimately not. Which wouldn’t make it all that different from even some of the more well-regarded megaWADs out there were it not for the fact that it also layers on top of this the expectation of living up to Yonatan Donner and Haggay Niv’s beloved opus, Hell Revealed. So you’re left with weird situations where maps are doubly disappointing for not being good Hell Revealed maps and also just not being good. Even the satisfactory maps don’t usually evoke the original save through imitation, so the comparison ends up being a giant albatross.

But I talked about that last week. Separated from expectation there is a lot to like about Hell Revealed 2, even if the first string of maps sets a qualitative benchmark that the rest of the WAD doesn’t consistently measure up to. It has certainly made me into a fan of a couple of its authors, specifically Jonas Feragen and Yashar Garibzadeh. Between them they’re responsible for most of the mapset’s high points, like MAP04 and MAP17, which is even more commendable in Feragen’s case given that he maintains such a high level of quality despite shouldering a larger share of the mapmaking burden than anyone else (he has credits on almost half the WAD’s maps). It’s easy to get a sense that the WAD is worse than it really is when good levels are followed up by not-so-good ones. That’s ultimately its greatest failing. Not that it isn’t a good Hell Revealed mapset (though that’s certainly true, also), but that it isn’t consistently good. It never gets into a groove and stays there for very long.

And the final stretch, Episode 3, as it were, is as guilty of this as the first two episodes, perhaps moreso. It sometimes seems that for every beautiful section there’s a nondescript one, for every fun moment a slog. And then there’s MAP25, the proverbial Jekyll and Hyde, which somehow struggles to be both a good and bad map at the same time. The overall quality is actually pretty high if you stand back and look at it objectively, but you know what they say about bad eggs. It’s easy to forget that MAP21 and MAP22 were both enjoyable when you’re waist-deep in MAP23. But rest assured, there are plenty of good moments. Enough that it’s worth chronicling, anyway.

MAP21: Conflux by Jonas Feragen

No Caption Provided

Feragen turns in a quaint little installation in concrete and steel with a few small nukage vats for good measure. The facility powers on as you approach it, making a good first impression that the level manages to sustain up until you hit the final switch. There are more monsters than you would expect from a map of this size, though apart from the yellow key ambush they never really invade your space. There are also a couple of strange cases where enemies are movement blocked for no discernable reason. These are pretty minor issues, though, and the visuals are more than enough to make up for any gameplay shortcomings.

MAP22: Sewer Slaughter by Yashar Garibzadeh

No Caption Provided

A very well-made sewer level with good details and lighting, as well as some nostalgic visual nods to Underhalls. You’ll find lots of mossy brick and cement in this dimly-lit substructure, as well as an abundance of water, naturally. On the gameplay front it has a bit of a dual personality. The first half is pretty breezy, giving off the impression that it will be a total pushover, only to give way to some painful ambushes toward the back half. There are some good fights to sink your teeth into once the level truly arrives, and enough ordinance and health to keep you from feeling too terribly put-upon.

MAP23: When the Heavens Fall by Martin Friberg

No Caption Provided

Some decent lighting here, but a lot of the level suffers from too much space and too little detail. The texture theme changes often, preventing the map from ever feeling truly cohesive, though industrial textures are the most prevalent. You’ll be facing off against quite a few heavies, though, strangely, the author pulls punches at key moments. The yellow key ambush gives the player an impregnable hiding place to defend, for instance, and the red key ambush involves assailants so high up that they aren’t all that threatening, or even necessary to contend with. With a little more spit and polish, this level could have been a lot better.

MAP24: The Inmost Dens III by Sam Woodman & Andy Olivera

No Caption Provided

The Inmost Dens is a perennial favorite among mappers looking to remake a classic id map, and while this might not be my favorite version of it, it’s not terrible either. The signature motif (tan rock, gray brick, corroded metal) remains intact, with slightly more gray brick than you may remember. Enemies are packed tight and there’s not much room to maneuver, so rushing forward is not advisable unless you’d like to be the cold cuts on a demon sandwich. Surviving the final battle requires a little clairvoyance, and the bridge section has posts that are easy to get tripped up on, but otherwise it’s a perfectly serviceable map.

MAP25: The End is Nigh by Sam Woodman, Andy Olivera, & Pedro Blanco

No Caption Provided

An interesting level with a surprising new feature: custom textures! There are two distinct sections to the map: a linear progression of arena battles followed by a hub-based key hunt. The arena fights aren’t too bad what with the profusion of rocket and cell ammo you’ll have, not to mention the megaspheres. Things get trickier in the second half though with lots of traps, nasty close-quarters fighting, and less health and armor. The first part looks nice enough and uses the new textures to make a sort of gothic hellish theme, while the latter part introduce new corrugated steel and mossy rock textures that, honestly, are kind of ugly.

MAP26: Dis 2000 by Pedro Blanco

No Caption Provided

A remade and expanded version of the final level of Inferno. The signature four-pronged marble courtyard is now flooded with lava, making fighting and traversal a little more taxing this time. It’s a pretty straightforward map in terms of progression, with three zones attached to the lava yard, each housing a key. Architecture is predominantly green marble and feels faithful to E3M8 even in the areas that are entirely new. Battles are a mixture of death traps and more straightforward encounters, some of which are pretty clever. Sadly, despite quadrupling the stakes, the final mastermind showdown is still a joke, especially if you get some infighting going.

MAP27: Resistance Remains by Sam Woodman & Andy Olivera

No Caption Provided

Easily one of the hardest levels in Hell Revealed II. Woodman and Olivera take the scalpel to Resistance is Futile (MAP22 of Hell Revealed), making it considerably smaller while adding a number of additional side areas. Arch-viles are the main threat, as they come early, often, and frequently in groups, though there are plenty of other monsters looking to send you to an early grave. There’s very little unoccupied real estate, in fact, but with cell ammo everywhere, you can BFG anything that so much as looks at you funny. It certainly doesn’t dethrone the original, but it’s nice to get a stiff challenge. I mean, it’s Hell Revealed, after all.

MAP28: Beyond the Sea by Andy Olivera

No Caption Provided

Another tan rock/dark metal bastion, though this time with a watery central yard surrounded by cracked concrete walls. Architecture is pretty basic overall, and the lighting is rudimentary. In particular the extreme brightness of the outdoor areas is really off-putting. Progression is pure switch-hunt: hit a button, figure out what it did, rinse, repeat. There are a lot of monsters, but not much care taken in their placement or composition. You’ll often stumble upon closets full of one monster type that have unlocked in areas you’ve previously visited, and you’re forced to return to the center of the map periodically, where you will literally fight the same battle four times. Ugh.

MAP29: Hell’s Cauldron by Jonas Feragen

No Caption Provided

The final standard map of the set is suitably grand: a long, winding ascent to the apex of an infernal crag. There’s deadly lava to be wary of, but the most dangerous feature is long-range bombardment. Several times you’ll have to contend with up-close threats while additional foes attempt to assail you from outside your range. There’s rarely as much space or cover as you’d like, but always enough to survive. With no keys and precious few switches, it’s all about the steady drip-feed of tough battles. Architecture is pretty plain throughout, and the final fight in a yawning caldera is something of a letdown, honestly, but in this case it’s all about the journey.

MAP30: Source Control by Jonas Feragen

No Caption Provided

Using a rock and lava aesthetic similar to the previous map (with one peculiar piece of tech inserted), Feragen crafts a simple, claustrophobic send-off to the WAD. It begins with a brief and perfunctory series of arch-vile fights leading up to a teleport pad to the level proper. From there, you’ll need to quickly frag three additional arch-viles camping out on skull keys before dislodging a cyberdemon from a platform that, obviously, you need to reach. Like MAP30 of Hell Revealed, the deluge of spawning monsters is so intense that even constant BFG spam will eventually be a losing proposition. Ultimately not as good as Donner’s MAP30, but then again what is.

Looking back, my last sentiment regarding MAP30 could really be extrapolated to the mapset as a whole. “Not as good as Hell Revealed, but then again what is.” It’s not fair to measure any megaWAD against a landmark such as Hell Revealed, but it’s a comparison its authors invited, and one that’s thus impossible to avoid. Even at its worst, Hell Revealed 2 never feels insurmountable. There is no Post Mortem or Afterlife here, levels where success comes seemingly through a combination of divine providence and sheer force of will. The hardest maps in Hell Revealed 2 are really, really difficult. The worst maps in Hell Revealed are nightmares, and just barely beatable. But that’s the fun. Figuring out how to do it, and surprising yourself. There’s none of that here, which both saddens and relieves me. Beating this WAD on UV is not an accomplishment on the scale of beating the original, a feat that you can justifiably brag about. It is however, a decent enough set of levels, whose highs outweigh its lows, and one that’s certainly worth a look.

Start the Conversation

Doom Travelogues 07: Hell Revealed 2, Part 2

Welcome to week two of my ongoing misadventures in playing WADs that may or may not be too hard for me. Last week you may recall that I started playing Hell Revealed 2, the sequel to probably the most trying WAD in my map-playing career. To my great surprise and mild disappointment I’ve been making steady progress with it, which means I’ll most likely have to finish it come hell or high water now that I’ve come as far as I have. I predicted last week that things would get tougher in the second episode, and they have, for the most part, but not nearly to the degree that I had feared. There are a lot of good levels in the second episode, and if I could complain about anything it would be that the kind of difficulty that HR.wad was known for, the kind that puts the screws to you early and doesn’t let up until you finish the level, is only seen here fleetingly. Kind of weird to be complaining about not pulling my hair out, I know.

So it would seem my fears of being repeatedly curb stomped by cyberdemons were unfounded, which is a bit of a relief. That said, when you invoke a name you invoke everything that comes with it, and Hell Revealed 2 may have ultimately done itself a disservice by tying itself to Hell Revealed. As I said in Part 1, Hell Revealed is known for one thing above all else, difficulty, and if you’re going to make a sequel to it it had better be damn hard (ergo the disappointment I expressed earlier). HR2 is certainly hard, but finishing a level in HR sometimes felt like a lesser miracle. There has been no Last Look at Eden or City in the Clouds thus far, and I’m doubtful that there will be a Post Mortem waiting for me in the final stretch.

But I’m belaboring the point a bit. The problem is with the expectations set by the name and not, by and large, with the levels themselves. Had it been called something else this is a conversation that wouldn’t even be occurring. But of course it wasn’t called something else. Thankfully, this isn’t so much of a problem when playing it, because taken on their own merits the maps of Episode 2 are actually pretty good. So let’s stop stalling and get to talking about them, shall we?

MAP12: Anti Static by Michael Reid

No Caption Provided

Michael Reid kicks off the second episode with the first true slaughterfest of the mapset. The main battleground is a Suburbs-ish outdoor zone with a handful of small buildings. Every key grab is tied to a monster ambush, each one larger than the last, and all of them involve large numbers of arch-viles, so fighting monster packs head-on is suicide. Holing up with a rocket launcher, on the other hand, works wonders. The 3D bridges and transparent platforms are a nice touch, the gargantuan monster closets that dispense most of the level’s enemies, less so.

MAP13: Hardcore by Jonas Feragen

No Caption Provided

The mapset’s first full-on homage to its forefather, Hardcore is a dead ringer for Dead Progressive, i.e., MAP25 of Hell Revealed. There’s no mistaking Feragen’s source of inspiration here, and in fact the only dramatic change architecturally is the northern section of the map. Gameplay-wise, it’s a smallish open-air arena-style map which rewards meticulous play. Most of the Doom cast make appearances, with some cyber and mastermind action even, but, surprisingly, it’s seems easier than the original. I spent most of the level waiting for a nasty ambush or devious trap that never came. Oh well.

MAP14: Metal Meltdown by Sam Woodman

No Caption Provided

For his second effort Woodman transports you to a hellish metallic bastion suspended in the clouds. The map is divided into northern and southern sections, and figuring out how to cross the demon-infested bridge between them is probably the biggest challenge you’ll face. There are no less than five cybers here, but one can be telefragged and the other four are released individually into a spacious arena with a number of cover points. Provided you’re not prone to taking rockets in the face, there really isn’t anything to get yourself too worked up about.

MAP15: The Path II by Jonas Feragen

No Caption Provided

Like the original, The Path II features cavernous expanses of brown stone with narrow pathways over caustic blood. A handful of rad suits offer some much-needed maneuverability early on as you scramble to get your bearings while harried by mancubi, revenants, arch-viles, and more. It’s the most successful level thus far in terms of emulating the Hell Revealed play style, with tough encounters from start to finish. There are a few boring mono-monster packs thrown in, but by and large Feragen uses enemies thoughtfully to create a variety of uncomfortable situations.

MAP31: The Descent II by Mattias Berggren

No Caption Provided

As an alternate take on Hell Revealed’s MAP31, it has the same central conceit: a long, tense elevator ride in which the player is continuously assaulted by spawning monsters. It’s a nice, frantic struggle to hold onto what little elbow room you have. Level progression is more traditional and perhaps a little less exciting once you reach the bottom, but uncomfortable proximity to baddies remains a consistent theme throughout. The late-level quadra-cyber fight is maybe the rudest encounter of the map, all but requiring a nearby (and secret) invulnerability sphere.

MAP32: Playground by Jonas Feragen

No Caption Provided

From the get-go Playground is clearly aiming to be a classic uber-hard super secret level in the vein of well-loved MAP32s like Go 2 It and Mostly Harmful. Unfortunately, it doesn’t quite hit the mark, though not for lack of trying. The entirety of the map is a medium-size octagonal arena choked with monsters at the outset and refilled periodically through switches. While a good idea for a map in theory, unless you already know the lay of the land and what switches trigger what, the only realistic way to handle the hordes thrown at you is to hide out in a semicircular hallway in the northern part of the map and wait for your pursuers to kill each other off. Exhilarating stuff.

MAP16: The Chapel of Black Granite by Sam Woodman

No Caption Provided

A bit of a rough level from Woodman this time. Although there’s some nice lighting here and there, it’s still pretty lackluster visually due to overly orthogonal architecture and a general lack of detail. Monster composition leaves something to be desired as well. Whether it be arch-viles locked ineffectually in cages or chaingunners packed single-file in a tight corridor for easy killing, enemy positioning often doesn’t make sense. There are a few good fights to counterbalance things, and decent secrets, but when all’s said and done you’ll likely be more than happy to move on to the next level.

MAP17: An Eye for an Eye by Yashar Garibzadeh

No Caption Provided

Perhaps channelling Malcom Sailor, Eye for an Eye focuses on tricky fights with small numbers of toughs. In particular, surprise arch-viles are a near-constant threat. Your reaction speed is frequently tested as threats materialize out of nowhere, but there’s always a fighting chance. The level is largely constructed of familiar Doom 2 brown brick and stone textures broken up with unique features in certain areas like a blood fountain courtyard or a lava overlook. Maybe not the hardest level, but monster placement is smart and there’s nothing to complain about visually.

MAP18: Excess Meat by Jonas Feragen

No Caption Provided

After a quick, invulnerabilty-fueled opener, the map becomes something of a hub, with four self-contained subareas accessed via teleporters in the starting zone. Progression is linear, though, since completing one area unlocks the next. Opposition is stiff and traps are plentiful such that you’ll probably hesitate before entering each new pad. The areas are well-made but the level suffers from a lack of thematic consistency due to its fragmented design. By map’s end you’ll have traversed a canyon, a metal/industrial nukage center, a dimly-lit cave, and a wood/brick arena.

MAP19: Mind Trap by Jonas Feragen

No Caption Provided

An impressive, sprawling fortress level dominated by brown brick and steel. With “trap” right in the title, you’d expect to find a lot of hairy scenarios, and find them you shall. If you assume that every door, lift, or teleporter leads to something nasty, you’ll be right most of the time. The map’s verticality deserves special mention. You’ll spend a good deal of time fighting on parapets and gradually scaling a centrally-located tower with the aid of crisscrossing bridges. Monsters will often fire upon you from above or below, and you can even preview later areas by peering over walls or through windows.

MAP20: Fear of the Dark by Martin Friberg

No Caption Provided

Maybe a little relaxed for the end of an episode, but an enjoyable level nonetheless. Visibility is pretty low throughout, but there’s just enough light to prevent you from being cheap shotted by a foe you didn’t know was there. Structurally, it’s a pretty standard hub, with several small areas branching out from the start that you’ll visit in sequence as you gain keys. In addition to the fixed-position monsters, hellspawn will inundate the map at key points, including a few cybers that invade the main hall. The dark atmosphere is nice, if a bit at odds with the rest of the mapset, but even at its worst it’s a pretty humane map.

A few rough spots aside, it was another good week. MAP17 and MAP19 are both great levels, and MAP15 deserves mention for being the first time I felt like I was actually playing a Hell Revealed map. Really, I wouldn’t mind replaying most of these levels if I’m being completely honest. Maybe not MAP16. Or MAP32. My God, that map. Anyway, there’s been more than enough enjoyment here for me to keep on trucking in order to hopefully finish this out in the very near future, barring some sort of natural disaster, by which I mean something shiny that distracts me or a really, really hard level. Until next time then.

Start the Conversation

Doom Travelogues 06: Hell Revealed 2, Part 1

1997’s Hell Revealed is one of the few Doom fan creations that you could honestly argue has been as influential within the community as any of the original IWADs. It is not hyperbolic to claim that many of the super-hard WADs that have been released in the years following owe their very existence to Hell Revealed, which legitimized a brutal, take-no-prisoners approach toward gameplay that, more than fifteen years later, is still extremely popular. To this day Hell Revealed is commonly invoked as shorthand to indicate that a map or mapset is really hard, and later classics like Alien Vendetta and the Deus Vult series are seemingly impossible to discuss without mentioning it.

Possibly the Doomiest title screen I have ever seen. Eat your heart out, Romero!

Now, I have a complicated relationship with Hell Revealed, which is another way of saying I’m not overly fond of dying a lot. One of the things you have to wrap your head around when playing HR’s maps is that you can’t really play them the way you would most other Doom levels. They were made by speedrunners, i.e., people who enjoy dissecting levels and learning the optimal ways to complete them, and as a result many of Hell Revealed’s maps demand this same approach from the player. It has been said before that Hell Revealed maps are more fun to replay than they are to play for the first time, and I can’t say that I disagree with this logic.

When I first set out to complete the “10 Years of Doom” feature, I kind of assumed Hell Revealed would end up being my white whale, that trying to complete it without manual saves would eventually spark some sort of nervous breakdown, and that I would quit the whole endevour in frustration. This turned out not to be the case, though I did seriously doubt my ability to complete the WAD at a couple of points. When I finally emerged from the ordeal, blood-soaked and tired, I knew that I had nothing left to fear from the remaining WADs on the list, for surely nothing could be as trying as what I had just emerged from.

And nothing was. But now that I’ve closed the book on the first ten years of Doom (for the time being) I find myself staring Hell Revealed 2 right in its beady red eyes, and I’ll be damned if I’m going to flinch. I expect I’ll be chipping slowly away at this WAD over the course of a few weeks, as I did with the first, so it seemed appropriate to do a multi-part feature as I wend my way haplessly through it. At the very least it will give me some down time between particularly traumatic levels or act as a cautionary tale should I eventually be driven mad by my own hubris.

MAP01: IGNITION! by Jonas Feragen

No Caption Provided

A small but attractive opening map that, judging by the three SSGs strewn about, was originally designed for deathmatch. The gameplay is pleasantly difficult, with monsters all about but plenty of places to duck in and out of should you have the need. The biggest challenge would have to be the two Arch-Viles squatting in the exit room, but you do have a rocket launcher at your disposal and a few different options when it comes to approaching them. A rough introduction, certainly, but not overly so.

MAP02: High Voltage by Jonas Feragen

No Caption Provided

Another small map, this one starting off with an interesting battle on a pier between you, a baron, and some shotgunners. After that you’ll face a hallway choked with zombiemen with an adjacent side yard full of… more zombiemen. Yeah, a little wierd. This level’s honestly not too bad, though Feragen does try to get you uncomfortably close to some toughs at a few points. Like the last level, it looks quite nice, with a combination of nukage, natural environs, and high-tech textures.

MAP03: Shackled by Jonas Feragen

No Caption Provided

Things start to get a bit more serious as Feragen throws a larger number a of monsters at you in trickier scenarios. This includes a number of way to get ambushed if you’re not careful. While a good map overall, sadly a few questionable monster encounters dampen the fun ever so slightly. To wit, the hallway full of barons is unfortunately more of a chore than a challenge, and I can’t say I appreciated the blind teleport into hell knights trap, either. Apart from these two gripes, it’s an enjoyable level.

MAP04: Reluctant Pain by Jonas Feragen

No Caption Provided

There have been some good levels thus far, but this is probably the first real keeper of the bunch. Feragen gets a lot of milage out of this tiny map, filling it with several tense firefights with just enough room to eke out a win. The main action takes place in two multi-tiered outdoor areas composed of brown stone and nukage, both of which get refilled with monsters at a certain point. I like the majority of the level so much in fact that not even the reappearance of the dreaded close-quarters hell knight trap could bring me down.

MAP05: Insatanity by Jonas Feragen & Derek McDonald

No Caption Provided

A few challenging encounters can be found here, but overall this is a step down in difficulty after the last two maps. The number of toughs is in the single digits, actually. One of the hardest fights, the SSG room, is entirely optional, as is the blue key card. Still, the level is extremely tight health-wise, so there’s ample room for you to screw up in such a way that you won’t be able to recover. It’s very nice to look at, too, with good use of brown brick, rusty steel, and a little bit of water.

MAP06: Revival by Mike Watson

No Caption Provided

A rather plain-looking map compared to the previous ones, with lots of gray brick and basic architecture. The skylight in the first room is a nice touch, though. It fares better in the gameplay department, however the difficulty is mitigated significantly by the level’s layout, which allows you to duck in and out of cover pretty effectively throughout. A nasty baron trap midway through is probably the level’s most dangerous encounter, but savvy players will be able to back out to a position of relative safety. A cyber rear’s its head, too (the mapset’s first), but only completionists need fight it.

MAP07: Not That Simple II by Jonas Feragen

No Caption Provided

Yet another solid contribution from Feragen. It starts out with the familiar Dead Simple manc-rachnotron arena battle before spilling out into less familiar territory. Once you’ve crossed the bridge into the second half of the level there are a number of large monster packs to contend with, but with ample ammunition and room to breathe things are pretty manageable. My favorite feature of the map has to be the cyberdemon gatekeeper that makes sure you don’t try to skip the opening battle.

MAP08: Ballistics by Sam Woodman

No Caption Provided

The first thing you’ll notice about Ballistics is that there are shell boxes all over the damn place. Seriously, even if you can’t hit the broad side of a barn, you’ll have enough shotgun ammo to see you through. Once you get over the item litter you’ll notice the level is composed of two identical courtyards encircled by raised and barred walkways. Opposition here is pretty stiff, but patience goes a long way since enemies are often confined to very specific zones. The mirrored design means you’ll know the layout of the back half by the time you reach it, and the final cyberdemon showdown is similarly telegraphed.

MAP09: The Siege II by Jonas Feragen

No Caption Provided

An interesting concept piece by Feragen. After fighting off imps and spectres with a rocket launcher, you’re transported to a small box with a window on each side where you’re required to literally hold down the fort as you wait patiently for an exit teleporter to lower. A host of beasties (mostly revenants) attack from all sides while cacos and pain elementals encroach from above. There’s plenty of ammo and health provided for you, so the main imperative is to keep moving and take as few hits as possible.

MAP10: Base Blaze by Yashar Garibzadeh

No Caption Provided

The standout feature of this map is an early fake-out involving a false exit precipitated by three key cards which are more or less handed to you on a silver platter. This bizarre sequence aside, it’s a pretty nondescript map that shuffles you from one small area to the next so quickly that it never really establishes a firm identity. The hardest bit involves a claustrophobic revenant fight, though you’re thrown a megasphere beforehand, as if the author felt remorse for what he was about to do.

MAP11: Raw Hatred by Mike Watson & Eric Roberts

No Caption Provided

The grand finale to E1 is primarily silver techbase with some brown brick and green marble areas attached. Gameplay is surprisingly breezy up until the final stretch where Watson dutifully reminds you that “Yes, Virginia, there is a Satan.” The main source of pain is revealed behind a facade wall that lowers to reveal a baron/knight mix backed by arch-viles. You’ll have an invulnerability, two megaspheres, and lots of ammo at your disposal in this map, so there’s more than enough here to see you safely to the exit.

All things considered, the first episode of Hell Revealed 2 could have been a lot worse. Of course, the thing that’s oft forgotten about Hell Revealed the First is that it doesn’t really take it’s gloves off until the second chapter. So if history repeats itself things are about to become much less amenable for little ol’ me. One additional thing I’ll say is that Hell Revealed 2 certainly looks better than the first one. Hell Revealed wasn’t ugly by any stretch of the imagination, but the gameplay was clearly the primary concern, and I’ve been very much appreciating the greater attention to aesthetics in the sequel. The Hell Revealed series is predicated on trial and error in a lot of ways, so it helps that a level look nice when you’re replaying it for the sixth time. With few exceptions, HR2 has been a pretty pleasant experience, and I see no reason not to keep pushing forward. Famous last words and such.

Start the Conversation

Doom Travelogues 05: Everything Old is Still Old

It’s not hard to understand why there are so many Episode 1 replacements out there. It was the shareware episode. It was played more than any other, and it has the most nostalgia attached to it. I’ve played more than a few E1 replacements, but I don’t think I’ve seen anyone try what ReX Claussen has tried with 2004’s Phobos Revisited. More than an homage, it’s an attempt to create something new out of something old, to reuse level designs and architecture, interspersed with original creations, in such a way that they become new again. Needless to say, there are a lot of ways this could go wrong, and Phobos Revisited doesn’t entirely avoid every pitfall. When you choose to recreate something, you’re already competing against people’s memories of the thing, and few level sets are remembered more fondly than E1.

That said, though, I think Claussen does a pretty good job with the task he sets out for himself. It’s definitely not at the top of the heap when I think of my favorite E1s, and at times I wondered if he might have had better results creating new levels from the ground up, but when it works, it works quite well. As a change of pace, I decided to go ahead and write down my impressions on a level-by-level basis rather than as a whole. You could probably cobble together my complete impressions of the WAD from these assorted scribblings. If you happen to be a cobbler or something, I mean.

E1M1: Hangar

No Caption Provided

At first glance it appears to be nothing more than a cavernous take on E1M1. Problem is, all that extra space is largely empty, with no enemy encounters heavier than a light skirmish, and the rooms themselves aren’t detailed enough to be impressive on their own. Claussen does throw a few teleporter ambushes at you that you might not be expecting, and you do have to put a little bit of effort in if you want either of the armors, but otherwise there’s very little to worry about. The most interesting part of the level by far is the means by which you gain access to the exit chamber. Let’s just say you won’t be using the door. Oh, and there’s also a little surprise for you when you leave, but nothing so severe that you won’t be able to handle it.

E1M2: Nuclear Plant

No Caption Provided

In contrast to the spaciousness of the previous level, E1M2 is a condensed version of the original, with Claussen seemingly trimming the fat wherever he can. You won’t really be feeling the pinch, though, as you’re still fighting the familiar E1 cadre in all its squishiness. This is a better experience than the empty expanses of E1M1, though it adheres to the progression if id’s Nuclear Plant perhaps a little too slavishly. The southwestern area of the map has undergone the most change, with the tech maze being truncated to the point where it can no longer accurately be called a maze. Not a problem for me, though, since I’ve never much cared for mazes anyway. The green armor trap in the starting chamber is another alteration that I very much appreciated.

E1M3: Toxin Refinery

No Caption Provided

Claussen finally starts tinkering with the formula a bit more, and the results are quite pleasing. His version of the Toxin Refinery forces players through familiar environments, but in ways they certainly won’t be accustomed to. The secret yellow key area (now housing the blue key) has become its own wing, and the former east and west wings are now conjoined. The secret exit is now the standard exit, and a few powerful pick-ups are placed tantalizingly out of reach in the starting area. The blackout room is still around, but has been repositioned to take you by surprise once more. You can actually skip a lot of this level if you don’t care about percentages or secrets, but of course you’ll want to stick around to figure out where the new secret exit is.

E1M4: Command Control

No Caption Provided

While structurally very similar to the original, the rooms here are more often than not reimaginings rather than straight architectural recreations, so you can at times fool yourself into thinking you’re playing something entirely new. There are a few new touches here and there, but nothing terribly memorable. The most noteworthy change is the circular central chamber, which now must be unlocked via blue key card. For your trouble you’ll get to face a torrent of imps. Claussen seems to have an obsession with curved hallways, and this is perhaps the first map where this leaning begins to stick out. In particular, the long “S” hallway to the north seems bizarre and out of place. Not a bad level overall, but certainly not the strongest of the bunch.

E1M5: Phobos Lab

No Caption Provided

Something of a return to form after E1M4, Revisited’s Phobos Lab is a proper remix of one of my favorite E1 levels. The progression here has been totally revised despite the level looking mostly the same. Rather than jumping across, you start by taking a trip down the nukage channel in the first room, which leads to a switch that opens up the level proper. The main challenge is accessing the yellow key card, which is protected by a switch puzzle, albeit not a very difficult one. Claussen works in some welcome additions, like an outdoor fracas, without trampling the identity of the underlying level. It’s also a bit more challenging than previous outings, with a few places where you can be sandwiched if you aren’t careful. All in all, it’s a satisfying fusion.

E1M6: Central Processing

No Caption Provided

Central Processing is graced with perhaps the most hectic opener to this point, tasking you with prying a shotgun away from a sergeant and downing a demon before a group of hungry hungry imp-os close in on you from the rear. Not rocket science, sure, but more taxing than previous levels. From there the level proceeds much like you’d expect, though you’ll often be entering rooms from angles you wouldn’t expect based on past experience. The biggest change here is that the exit has been relocated, and thus what was formerly an arena for the final battle is now just a room. I’ll admit that I was hoping for a few more surprises than were actually delivered, but it’s a solid level with only one conspicuously long and conspicuously boring curved hallway.
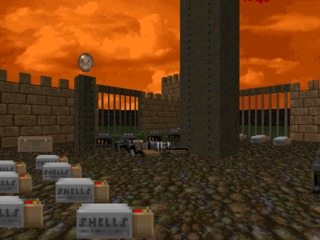
E1M7: Computer Station

No Caption Provided

E1M7 strikes a good balance of old and new, with architecture you’ll most certainly remember intermingled with attractive new locales. Gameplay is spicy but not too spicy, featuring a mad dash for the chaingun at the beginning and several multi-pronged imp assaults. There are crumbling walls and floors throughout the level, a nice touch, though regrettably this is the only level with such details. From the outset most of the level is already open for exploration. The challenge comes in figuring out how to access the first key, after which the rest explains itself. Along with E1M5, this is probably the most successful level in terms of giving an old level new life. The only blemish is yet another ugly and baffling “S” corridor in the southern area of the map.

E1M8: Phobos Anomaly

No Caption Provided

The finale opens up with a clever twist on the familiar. Instead of overlooking a demon horde, the player is in the midst of them, and must punch a hole through in order to survive. It’s a simple change, but it works so well that it ends up feeling like it should have been that way to begin with. After that, you’ll fight a few waves of teleporting hellspawn (imps followed by spectres) before reaching the famous pentagram arena. The fight is a bit more interesting this time, with two waves of five Barons teleporting in at the points. There aren’t enough rockets to kill all of them, unfortunately, so at some point you’ll have to resort to small arms fire. After that, you can go outside and mop up some more imps or just skip it and head straight for the teleporter staircase.
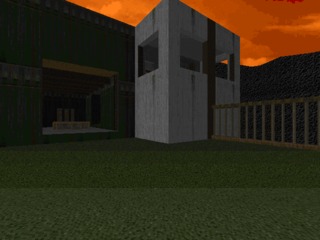
E1M9: Military Base

No Caption Provided

Another simple yet ingenious alteration at the beginning: this time you’re the one in the cage, and the imps are on the outside firing in. You’ll need to quickly grab your shotgun and hit the switch to get out, lest you be molested by fireballs. The construction of the level hasn’t changed much, although the rooms may look different. The map is essentially a wheel, with rooms that branch out from the center and are connected to each other by hallways. The player’s job is simply to circle the map collecting keys and unlocking doors until they find the red key card, at which point they can return to the center and exit the level. Nothing mind-blowing here in terms of level design or enemy encounters, but it’s short and attractive enough that I enjoyed it all the same.

The more I think about Phobos Revisited, the weirder it seems to me. Many have set out to recreate the feel of E1, but usually not by recreating the levels themselves. I feel like Claussen has done reasonably well in accomplishing his mission, but that the mission itself was maybe a little crazy. There are some good levels here (E1M3, E1M5, E1M7), but some haven’t changed enough (E1M2, E1M6), and others are so similar to their forebears that they barely seem new at all (E1M1, E1M8). At the end of the day, I prefer new levels to remixes, even if it’s a good remix, and even if those new levels aren’t that great. There is so much talent in the WAD community that to spend time in pursuit of recreating past glories seems a terrible waste.

Start the Conversation

Doom Travelogues 04: A Little Less Conversation

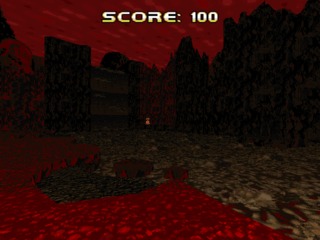
Welcome to Contraville, USA, where slow-moving bullets are the #1 cause of death.

Some things come along and take you totally by surprise, it seems. I had heard a little bit about 2004’s Action Doom prior to playing it, most of that little having to do with its over-the-top, tongue-in-cheek PR campaign involving fake print adverts, physical copies complete with manuals, and Action Doom-branded t-shirts. All of this build-up for a four-map Doom WAD is in and of itself pretty amusing, but, lo and behold, the WAD itself is also pretty fucking great. In my professional assessment, anyway. Pretty, fucking, great. With only a handful of levels “Scuba” Steve Browning somehow manages to catapult his WAD into a position alongside Aliens TC and Batman Doom, where it assumes its rightful place in the hallowed pantheon of truly impressive Doom total conversions.

So, what exactly is Action Doom, you say? Well, in the simplest terms it’s the answer to the question “What would the lovechild of Doom and Metal Slug look like?” Less simply, it is a side-scrolling 2D arcade game seen through the lens of a first-person shooter, where every bullet is a physical object that can be dodged and the only way to go is forward. Okay, I guess that’s a pretty simple explanation, too. It’s really not that hard to wrap your head around. You’re dropped into a level, as you always are in Doom, and fight your way across it in linear-like fashion. And Bosses. There are also bosses. More of them than there are levels, in fact.

I REGRET NOTHING!!!!

There’s a narrative setup for the WAD which, I’ll be honest, I didn’t read, but that’s okay since everything you need to know is conveyed through the game itself. Your journey is bookended by a couple brief cutscenes and, in a unique use of weapon sprites, you’ll occasionally come across clipboards giving you a brief glimpse into the UAC’s latest bad idea, that being genetic experimentation. Also aliens are in the mix this time, so look out for that. As is the case with many user WADs, if you go in assuming the story is “Those knuckleheads at the UAC are at it again!”, you won’t be wrong. The Metal Slug-style paramilitary theme and the addition of aliens are enough to give it an identity of its own, though, and the presentation doesn’t hurt either.
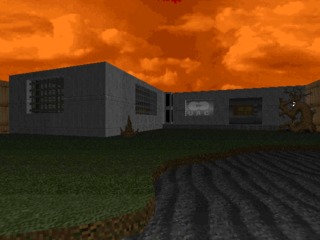
Speaking of presentation, the Metal Slug comparison continues to bear fruit. These levels are more or less straight lines with things to shoot along the way. The first mission is literally a one-way street with exploding buildings that enemies materialize from, a standoff with a tank, and a friggin’ Contra boss at the end. The second mission is even more Metal Sluggy due to multiple branching paths (including a super secret one!) that do a great job of selling the notion that you’re playing through a 2D arcade side-scroller in the first person. Despite the A-to-B construction and small number of levels there is a lot of variety here visually. Apart from the aforementioned cityscape, you’ll traipse through a forest, a lab, Hell, a space station, and a few other locales. All of it is well-realized and some sections are really impressive. Suffice it to say Scuba Steve pulls some things off in these levels that you’ve probably never seen before.
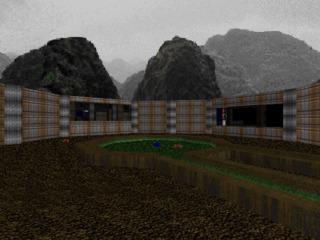
Yup, this is also a screenshot from this WAD. No, I'm not going to explain this one, either.

The gameplay end of the equation works pretty seamlessly with the level design to make this crazy arcade retrofit actually work. The Action Doom project apparently metastasized from a Metal Slug weapon mod, and not surprisingly you’ll be seeing heavy machine guns, raw-kit lawn-churrrs, and flamethrowers. There’s also an interesting spread-shot gun and a BFG replacement that, so far as I can tell, just kills you. All guns fire projectiles, and much like arcade shooters, these weapons are treated more or less like luxury items that temporarily boost your killing power. Most of the time you’ll be using your pistol, which isn’t a problem since most enemies die in one hit anyway. You also have a knife, though I can’t imagine why you’d want to get close enough to an enemy to use it since any hit will kill you.

You heard that right. You die in one hit. No health packs. No armor. Just you, your gun, and a single hit point. It’s straight-up Contra, which incidentally is also the name of the highest difficulty setting. Starting on the lowest difficulty setting does boost you to a full hundred hit points, but A) Who plays on the lowest difficulty setting?, B) Remember when I said no health packs?, and C) The true ending is only accessible through Contra difficulty. The WAD does autosave at specific points to ease the challenge a bit, but all the same you’ll probably want to maintain a separate save even if you’re the type of person who doesn’t normally like to. I decided on this course of action pretty early on and was extremely glad I did. Certain segments can get pretty bullet hellish.

It's hard to tell from this screenshot, but that's a river of corpses complete with bodies cascading over a waterfall. Grisly!

Opposition is a mixture of familiar faces and new additions. You’ll see a lot of sergeants and chaingunners, though their bullets are now projectile-class attacks. There’s also a new black ops trooper that in the dark is only visible by its eyes, which makes for a cool first impression when you first encounter them. Imps are back, but now try to sidle up to you and explode, kamikaze-style. There are also Thing-inspired imp headcrabs that show up at one point. Some pinkies make a cameo during your brief Hell jaunt, as do a couple of Bruiser Brothers. From time to time you’ll also have to take out stationary artillery pieces.

By far the most impressive new enemies are the WAD’s bosses. All of these fights are quite inventive and a lot of fun to tackle. They’re also a pretty bizarre lot, to the point that I feel like I shouldn’t say much more than that lest I ruin the fun. I’ll just say that a couple of these bosses had me shaking my head at just how ridiculous they were. The super-secret final boss is just the icing on the proverbial cake, requiring you to think outside the box a little in order to secure victory. To be honest, I have never witnessed this many creative, enjoyable boss fights in a single WAD, and I don’t imagine I’ll see anything that surpasses it anytime soon.

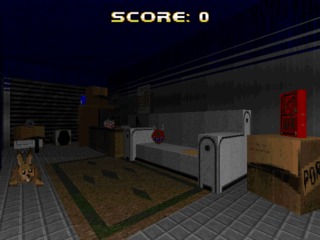
Nothing like relaxing at home with a six-pack, my Caco plushy, and... a copy of Daikatana? What the Hell?!

The soundtrack for Action Doom, contributed by Julian Aubourg, deserves special mention for doing an excellent job of setting the tone for your bloody gun-venture. We’re mostly talking about tunes that feel like they could have originated from some adrenaline-fueled 80’s action sci-fi affair. They’re fast-paced and percussive; in other words, good music to shoot dudes to. There’re also a few borrowed tracks that make their way to Action Doom from other series, including Metroid, Contra, and Metal Slug, which all feel like they’re used appropriately.

Action Doom just hits all the right notes for an arcade-inspired WAD. There’s even a score counter at the top center of the screen. And functional arcade cabinets inside it. A lot of it is super dumb and it’s not afraid to lean into it. Clearly, though, a lot of love and effort went into the creation of this big dumb thing and it shows. You can’t fake passion. In all aspects Scuba Steve went above and beyond with Action Doom, and I look forward to someday playing the sequel/prequel, Urban Brawl. If you haven’t figured out by now, I had a blast playing Action Doom, and if you give it a shot you probably will too. And Scuba Steve, wherever you are, thank you.

Start the Conversation

Doom Travelogues 03: Yucatáns & Pentagrams

And so it ends with a whimper. I finished this whole “10 Years of Doom” business this week, wrapping it all up with the RTC-3057 demo (despite the full release being available. I know, I know). Turns out, it’s pretty busted in newer versions of ZDoom, with missing textures, bugged music cues, and an unusable pistol. Also, the final puzzle is hard to complete even when you know the solution. So, kind of a wet thud. But there were plenty of good moments along the way. And it also frees me up to start playing WADs that were made in the last decade. I’ve already played some really promising stuff from 2004, one of which I’ll probably write about next week. As for this week, though, we go back even further, to a culture long forgotten by time... *cue wavy dissolve*

The Temple of Doom

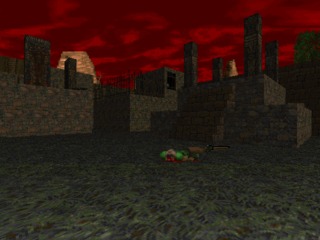
Hey, buddy. Yeah, you on the ground. I might need to borrow that shotgun for a bit.

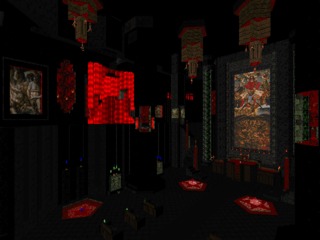
Custom textures can often have an unintentionally adverse affect on a WAD. Sometimes authors try to insinuate their own textures into the midst of id’s stock textures in ways that don’t end up working. Sometimes the aesthetic created by them doesn’t really mesh with Doom’s demon menagerie in a pleasing way. Sometimes the textures are just bad. Thankfully, 2001’s Brotherhood of Ruin, or Ruinbros, avoids all of the pitfalls one might normally associate with new textures and manages to create with its seven levels a compelling and unique theme that also seems perfectly suited for shotgun fire and Revenants.

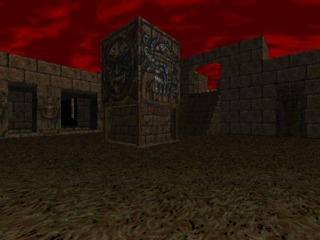
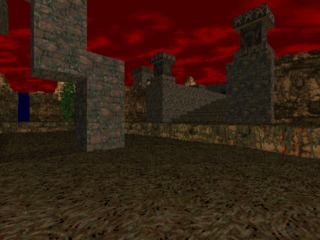
Right down to its striking, blood-red skybox, this is an ode to Mazaera, Hexen II’s fictionalized Mesoamerican continent. Cribbing from Raven games is nothing unheard of (quite the contrary, actually), but what is unusual is just how well it works in this instance. Oftentimes maps that lean heavily on Heretic or Hexen textures end up making Doom’s weapons and monsters seem like anachronisms. “Why is there a Cyberdemon in this medieval castle?” you might rightfully ask. Such thoughts never really occurred to me while playing Ruinbros; seeing hellspawn stalk the corridors of a crumbling Aztec temple never so much as raised an eyebrow. It probably helps that the textures used here are far less garish than Heretic’s, so Doom’s enemies don’t stand out quite as much. It also might help that I have a deep admiration for Pathways into Darkness, Bungie’s proto-System Shock by way of the Yucatán, so anything that reminds me of it even superficially gets a pass.

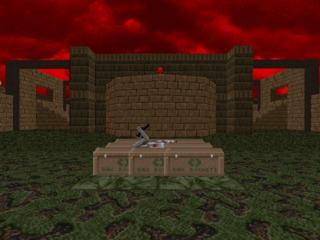
MAP05 is probably the mapset's peak in terms of difficulty, with a rather nasty opening courtyard fight.

Okay, that last bit was somewhat off the mark. Ruinbros neither gets a pass nor does it need one. It’s a legitimately stellar set of maps. My first experience with its author, Kristian Aro, was through 2002: A Doom Odyssey, where he contributed half the maps for E1. If you read my thoughts on ADO two weeks back you’ll know that I wasn’t much of a fan of it, and that I furthermore thought that E1 was the weakest of the four episodes. Well, Mr. Aro must work better alone, then, as these maps are far better and far more memorable than his five contributions to ADO.

All of the levels on display look great and are thoughtfully constructed, with stepped pyramids, musty temples, and rocky environs being the order of the day. Aro shows a good handle on level progression, often giving you glimpses of where you need to go before you have the means to get there. This means that even though you might not know what a particular switch did, you’ll usually have a pretty good idea. There’s not too much backtracking, either, and when there is you’re usually given something to fight for your trouble. Aro also doesn’t throw in keys just for the sake of padding, which I very much appreciate. In fact, map length is just about perfect, with most being medium-sized endeavours that end right about where you would want them to, i.e., just before you get combat fatigue.

The final ascent to the end of the WAD is well-guarded, as is the exit itself.

Its good that none of these levels are too long because Aro definitely doesn’t take it easy on you. Apart from Zombiemen, pretty much all the Doom cast is present and accounted for. You’re usually not going to see them in huge numbers, mind you, but in many cases movement is restricted such that just a couple of well-placed baddies can be a handful. Most encounters are fair, though, meaning that you’re rarely put in a situation where you’re guaranteed to take damage. Ammo distribution is tight enough that taking too many errant shots will have you feeling the pinch, and relying heavily on any one weapon isn’t an option much of the time. There are also a couple of Indiana Jones-style crusher traps that are notable for at least being thematically appropriate, which can’t be said of many maps that use them. If I could criticize anything about the encounters it would be the repeated use of enemies on inaccessible ledges, which are often found in awkward places where they don’t pose much of a threat at all, if any.

Brotherhood of Ruin is just an overall pleasant experience, and there’s really nothing bad I can say about it that doesn’t feel like nitpicking. Maybe if you hate fighting in close quarters you won’t like it, or if you just don’t like custom textures (Do those people exist? I don’t know). Well, the text file does say that it’s eleven levels long when it’s really only seven, so… I guess it’s total garbage and I should retract everything I just said. But really, if you’re at all interested in Doom WADs you should give this a spin. It’s fun. It’s something you haven’t seen before. In short, it’s the reason you play Doom WADs.

Cookin' with Gas

With the albatross of my original goal no longer draped around my neck, I’ll probably start taking more liberties with what WADs I choose to play from here on out. Looking ahead to the 2004 Cacowards I see that it includes Hell Revealed 2, which I’m already thinking about skipping. I have tremendous respect for the original, which popularized if not created an entire Doom map genre, but two slaughtermap megaWADs in a six-month span might be too much. I don’t know yet. I’ll cross or not cross that bridge when I get to it. In the meantime, I’m not going to stop playing Doom, which means I’m probably not going to stop writing about it either. So look out for that.

Start the Conversation

Doom Travelogues 02: Dark Corridors and Other Scenic Venues

It’s been an eventful week of WAD playing here, much more so than the last in terms of the sheer number of WADs under my belt. Believe it or not, I’ve gone through twelve in seven days, and while a few of those were one-off levels, over half of them were episode-length affairs, and one was a full 32-level megaWAD (albeit a concise one). This leaves me with an interesting dilemma: I don’t have either the desire or the capability to write cogently about all of them this week. So, instead, I’ve chosen to go in the opposite direction. I’m going to write about one of them. I’ll be detailing my experiences with some of the others at a later point in time, I’m sure, but I wanted to change things up yet again by doing something a little bit more long-form than the previous weeks. Why not try it on and see how it fits?

That MP Feeling

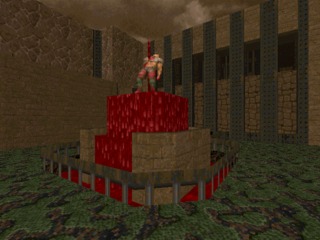
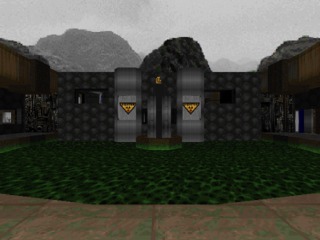
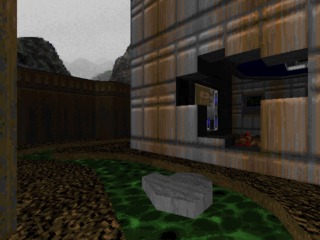
There are several open areas to explore in Dark 7: Mission Pack...

As you might surmise from its title, Dark 7: Mission Pack is a follow-up to author Bryant Robinson’s seven-level ZDoom episode Dark 7, which was released for Doom 2 way back in 2002 (both of them were, in fact). Despite the “Mission Pack” designation, though, it’s not an abridged experience, featuring roughly the same amount of content its predecessor had, and in some respects more. Truthfully, had it been released as Dark 7: The Sequel or Dark 7: Yet Again likely no one would have batted an eyelash. It has all the bells and whistles you’d expect to see from a ZDoom WAD, like sloped surfaces and the occasional scripted event, as well as quite a few resources (sounds, textures, etc.) culled from other sources.

Dark 7 MP stars a mercenary (looking conspicuously like the Doomguy) hired on by the UAC to help them course-correct after one of their innumerable self-inflicted catastrophic mishaps. And by “course-correct” I of course mean “shoot stuff”. The first of the WAD’s seven levels is actually a brief expository cutscene whose dialogue contains syntactic gems such as “Are the credits place where I want them to be?” and “So this is going to be another bug cleaning up job huh?”. Watching a cutscene play out in the Doom engine complete with poorly-constructed sentences is a lot like watching an eight-year-old attempt Shakespeare: the fact that it happens at all is impressive. It lasts all of about 45 seconds, just long enough to be charming rather than grating; from there on out the mapset is nothing but business.

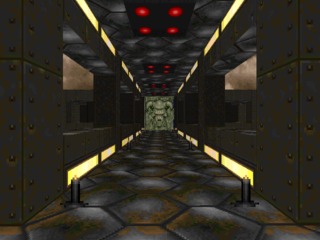
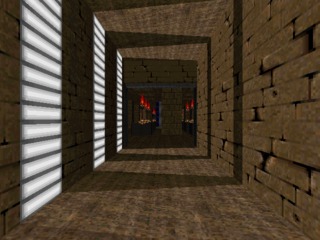
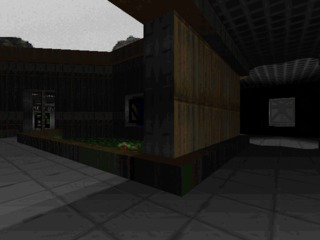
...but Robinson doesn't neglect the good old foreboding corridor, either.

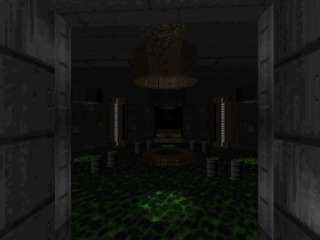
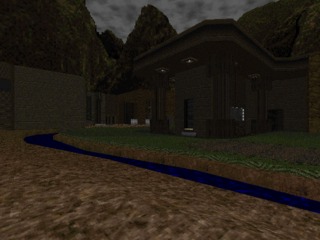
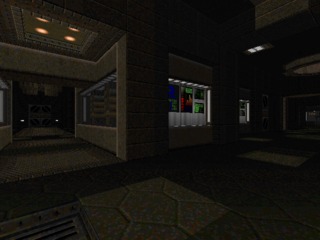
All throughout, MP is quite nice to look at, with Robinson making excellent use of Nick Baker’s nightmare1 texture set to create a series of dark, foreboding installations for you to blast your way through. While having the bulk of the mapset consist of dim, deserted UAC facilities could have been an exercise in monotony, Robinson is smart enough to inject a number of more natural features into the levels. You’ll traverse not just bases but the environments surrounding them as well, and even when inside you’ll often have skylights, windows, or other features to keep you from feeling claustrophobic. All of this is subtly brought to life with ambient sounds that don’t hit you over the head with their existence, as is too often the case with ZDoom maps.

It’s a pretty pleasant WAD to play, too. Things start out simple, with the difficulty gradually escalating as things proceed. Even so, it’s definitely on the easier side of the difficulty scale, and the lack of difficulty settings is a little disappointing. It bears saying, though, that the boss battles are a vast improvement over their dull, easily-defeated counterparts in the original Dark 7. The cramped dual-Cyberdemon fight at the end of MAP06 is the clear highlight of the set in terms of combat encounters. The Spiderdemon fight that caps things off in MAP07 is maybe not brain surgery (well, it is for ol’ Spidey, I guess), but there’s a potentially lethal surprise awaiting you once it’s done.

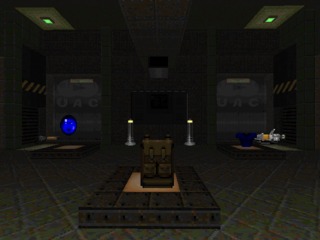
If this much loot makes you inherently nervous, you've played Doom before.

One reason for the somewhat slight challenge in Dark 7 MP is Cory Whittle’s SiN weapon mod, which is packaged with the WAD and intended to be run alongside it. Mind you, these weapons are actually well-done and suit the aesthetic of the levels perfectly, but they’re also super powerful. The assault rifle you start the game with is capable of rapid fire and pinpoint accuracy over long ranges, while the shotgun, found in the first room, is essentially an SSG that fires faster and only consumes one shell. The shotgun is so effective and so efficient that there’s rarely a need to use anything else, and you’ll find enough ammo for it that you won’t often be forced to. With such powerful ordinance, Robinson probably could have upped the ante a bit on the monster side.

The site of one of the more memorable battles in the mapset.

It’s worth mentioning that a large part of Dark 7 MP’s presentation involves assets and ideas on loan from other sources. Apart from the aforementioned SiN weapon pack, you’ll likely notice ambient effects from Quake 2, item sounds from Unreal, and monster noises from Doom 64. The whole affair has a distinctly Quake 2 flavor to it, owing a lot to the simple mission objectives you receive in each map and the WAD’s custom soundtrack, which has shades of Sonic Mayhem. None of this will come as a surprise to anyone who’s been playing user maps for very long, and Robinson actually does quite well at keeping these disparate parts from ever becoming discordant, but you may find yourself, as I did, pausing the game at some point to do a quick mental tally of how many games you’ve seen and heard in the last minute.

From top to bottom, Dark 7 Mission Pack is a really polished and enjoyable set of maps, and while you may occasionally wish it was more difficult or wonder why exactly there’s so much of other games in it, the package as a whole is so well-constructed that these thoughts will likely be only momentary. It doesn’t overstay its welcome or weigh its maps down with ZDoom features that needlessly draw attention to their own existence; it exudes confidence in pretty much every respect, and its concise two-hour running time compares favorably to pretty much any other two hours of Doom I’ve played.

Nothing Wrong That I Can't Fix...

So, part of the reason I decided to focus on a single WAD this week has to do with last week’s post, more specifically my mixed feelings about it. It wasn’t the shoddy writing that bothered me. No, I’ve gotten used to that. Rather, I was kind of miffed that I spent half of it talking about a WAD I didn’t much care for when I could have gone into greater detail about the one that I did. This is why I didn’t write anything about Dark 7, which I actually liked, just not nearly as much as the Mission Pack. Anyway, this will likely be the model going forward. Unless of course I change my mind next week, which is equally likely. Until then.

Start the Conversation

Doom Travelogues 01: Even Deeper

So, whad’ya know? I did another one of these. The quest continues here in Doomville, where I’m currently knee deep in year nine of the Doomworld “10 Years” feature. The end is in sight, but there’s still plenty of Dooming to be had before the beast is finally slain. Two more WADs are under my belt this week, which, I know what you’re thinking, doesn't sound like much. But consider that that accounts for 48 individual levels. Now consider how many levels you've played this week. Now go take a long walk off a short pier. Anyway, the victims this week are 2002: A Doom Odyssey and Caverns of Darkness, and, wouldn't you just know it, I liked one of them more than the other. They have pretty different goals, really, with one striking out on its own, the other paying homage, so they make for a pretty interesting contrast. Which was completely intentional on my part and in no way serendipitous happenstance. Well then, now that that's settled, and without further ado...

Much Ado About ADO

This E1M1 homage, oddly enough, is found about midway through E3M7.

2002: A Doom Odyssey is a full, four-episode replacement for Ultimate Doom, making it something of a rarity, as Doom 2 is by far the more popular point of origin for large-scale megaWADs. Like most mapsets of this size, it’s a team effort, though Paul Corfiatis, as the project lead, is by far its largest single contributor, credited with the creation of new textures and music for the WAD as well as around half its maps. There’s a shell of a story attached to these levels, full of typos and bad grammar, almost a requisite with Doom, which isn’t really worth mentioning apart from the fact that the fourth episode’s storyline involves Doomguy saving his wife Stephanie from the nefarious Tommy the Trooper. That tells you about all you need to know.

Unfortunately ADO does its damnedest to give a bad first impression. Even by 2002, there were a lot of good Episode 1 replacement WADs out there, and ADO’s E1 doesn't do a whole lot to distinguish itself from the pack. It comes off as a pretty standard set of E1-inspired maps, often with id architecture awkwardly copy/pasted in. There are several references to the E1M3 “Soul Sphere on a Pedestal,” for instance. It doesn't help that the gameplay throughout this section of the WAD is mostly subdued, presenting challenging encounters intermittently at best.

My reward for beating Episode 4. Just confirming what I already knew, of course.

Thankfully things do start picking up in Episode 2, with less frequent id-riffing and a greater degree of difficulty on display. On the whole it also shows a greater sense of restraint with health and ammo than the original levels, particularly with its distribution of rockets and cells. The regrettable downside is that at some point you’ll be forced into shotgunning packs of Barons and/or Cacos, which is the Doom equivalent of watching paint dry. On the extreme end of the difficulty curve is Chris Hansen’s E4M3, a level with four different but equally uncomfortably close-quarters Baron fights.

On the whole, ADO is a totally serviceable set of OG Doom maps that perhaps highlights why full Doom replacements weren’t and aren’t more common. Fighting Cacos and Barons gets pretty tiresome by the end, but they were the only toughs in Doom apart from the bosses, so you kind of have to use them. Less understandable is the map design, with a fair amount of naked key-hunting and too little of interest to look at. Joe Pallai’s E4M6, an excellent green marble castle romp and his only level in the set, throws into stark relief just how forgettable much of this excursion is. The custom music tracks are a welcome addition, but I don’t think I’ll be in any hurry to go back to this WAD.

Journey to the Center of the WAD

Caverns of Darkness is a 12-level Doom 2 partial conversion from a mapmaking outfit called The Chaos Crew. It makes use of some advanced engine features and is easiest to get running these days with the use of a separate ZDoom patch available at the idgames archive. In addition to some map tricks you won’t see in the vanilla Doom 2 executable, Caverns of Darkness also features a number of modified enemies and a single new weapon. The story, such as it is, involves, you guessed it, a demon invasion, this time originating from a UAC mining facility that may be more than it seems. This setup is all the justification needed to take you on a trip through a number of attractive subterranean Doom maps.

Man, you guys may wanna call a plumber. This leak looks pretty serious.

Though CoD is a team effort, there’s no doubt that Chris Lutz, who produced nine of the WAD’s twelve maps, is the real star of the show. That’s not to disparage Emil Brundage or Nokturnus (though I will mention that MAP09 by Nokturnus is a real bastard), who both turn in solid work with the remaining three maps, but Lutz’s work is really something else entirely. Lutz has an eye for aesthetics and attention to detail that you will seldom see in other mapmakers. He’s also a wizard when it comes to using the 3D bridge effect to seamlessly fake 3D spaces.

The mapset really catapults into must-play territory halfway through with the one-two punch of Perdition’s Abyss and Lava Processing (MAP06 & MAP07). This is where the WAD leaves the surface world behind, and the decor of these levels I can only describe as “steampunk lava stronghold". It’s very reminiscent of Quake (think E1M6 or DM4), though never in a derivative sense, with dark, ancient-looking architecture interwoven with lava. Apart from just looking and playing great, these levels have a few memorable set pieces, such as the realization in MAP06 that you have to power a generator to open a gate, or accidentally resurrecting a Baron in MAP07.

Spoiler: You will not leave here without fighting numerous demons.

CoD introduces a few new enemies and a weapon, with mixed results. The new Rocket Zombiemen and Inviso-Knights in particular seem somewhat ill-conceived. Both of these bad boys can basically ruin your day before you even know what’s happening, and the only defense is memorizing where they appear. The rest of the WAD’s additions seem fine. Spectral Arch-Viles appear with the ability to summon ethereal minions, and all human baddies have a chance on death to burst open, releasing a Lost Soul. The new weapon is an insanely powerful “BFG Fist” that can one-shot anything provided you can get close enough to punch it.

Caverns of Darkness is a really slick package. It has a consistent theme, plays well, and makes smart use of its extra engine features (like scripting and ambient sound). Even just walking through these levels with monsters disabled is worth the time, as they’re quite pretty, especially later on. Even MAP09, which is almost crushingly long and difficult, isn't bad enough to weigh down the package as a whole. In other words, it’s definitely worth a spin.

Postscript... and Tear!

Well alright then, another week done and dusted. Like I said last time, I can definitely see myself doing more of these, though I doubt I’ll be doing write-ups for every WAD I play or even every large WAD I play. I’ll probably keep this to level sets that make an impression on me in one way or another, and try to keep the format loose so as to not get terribly bored with doing them at some point. At any rate, this is all to be ironed out over time, I’m sure, so, in the interim, thanks for reading.

2 Comments
  • 11 results
  • 1
  • 2