
PART 1 - **NEW** PART 1.1 - PART 1.2 - PART 1.3 - PART 2 - PART 3 - PART 4 - PART 5 - PART 6 - PART 7 - PART 8 - PART 9 - PART 10 - PART 11 - PART 12 - PART 13 - PART 14 - PART 15 - PART 16 - PART 17 - PART 18 - PART 19 FINALE

Shinra Boat
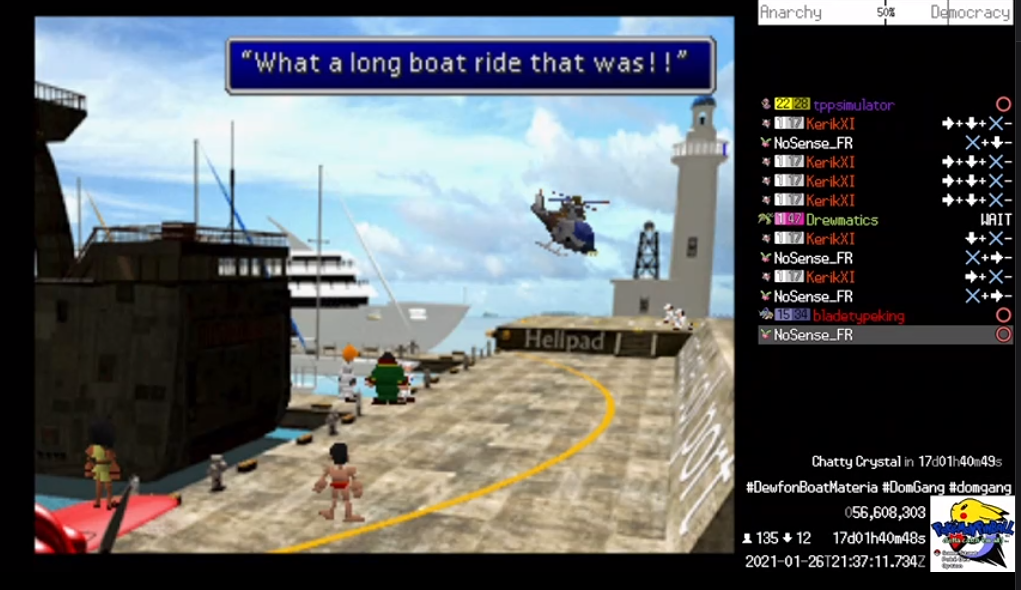
We have defeated the minigame gauntlet and set sail across the sea in our quest for Sephiroth. The boat sequence requires speaking to the rest of your incognito party to trigger a cutscene that finally allows you to proceed. It's a good chance to talk briefly about the routing in this, what to prioritize. Given our excruciating slow movement, side trips were generally avoided. This often meant that we "dashed" between save points and quest objectives, but it could also be our downfall. In this sequence, chat struggled a bit to trigger the plot forward, which involved a bit of backtracking up and down stairs and some frustrating ladder encounters. Playing casually you think nothing of just talking to everyone, but even in the time it took to move from one spot to another it was sometimes hard to keep track of who we had talked to and when. Finally we defeated the socializing boss, saved, and began preparing for the actual boss fight at the end of the boat sequence, our first encounter with Jenova. The walk up to the fight was just as dangerous, as the floor outside the boss room now had encounters, but we were still quite strong and well set up at this point.
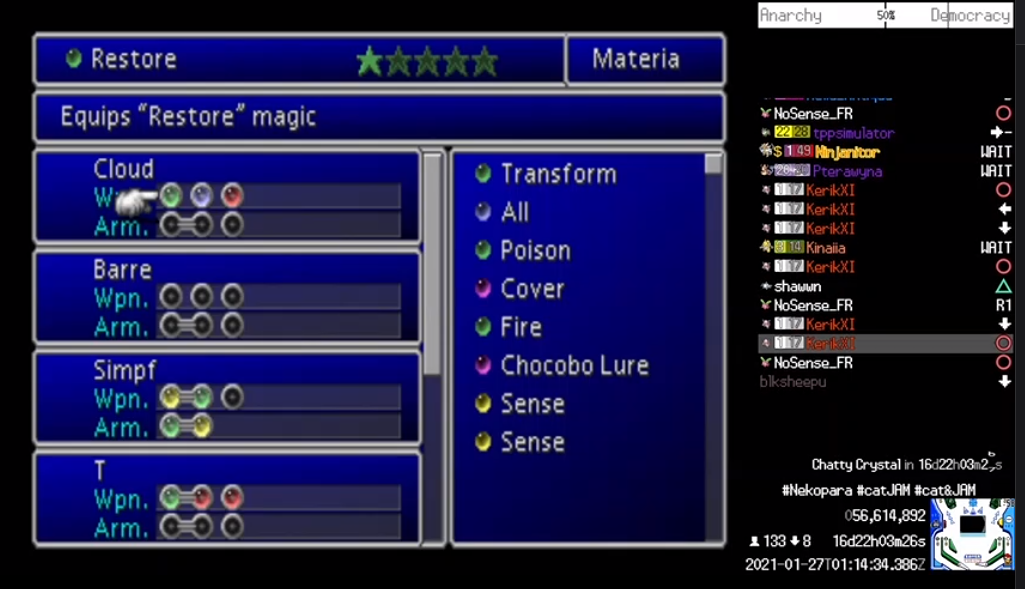
The boss strategy was pretty well tested by now. Cloud has been the main healer for most of the run, given his high magic stat and MP pool. It also reduces menuing for healing as he occupied the first party slot and Cure sits at the top of his magic list. He doesn't really need to use attack magic as his physical DPS is typically higher anyway. Aeris is top DPS right now and carrying the team, spamming bolt and her healing limit to sustain the party or even just herself. The third slot rotated for a while. All characters in this game are viable, but we never really used Red XIII outside required situations. Tifa and Barret both do respectable melee DPS and were basically interchangeable. For this fight we went with Barret, he's pretty tanky and requires no management. Jenova-BIRTH was not expected to be a roadblock and she wasn't, even if it did get a little hairy at the end. We grab the summon materia and proceed out of the room, as the ship docks at our next destination. However, chat had made a critical mistake.
During the boat sequence, there is a materia on the lower deck called All. When paired this materia lets you target a spell on all enemies or party members, and is extremely powerful. If you already have Yuffie by this point in the game, she will be body blocking this materia during the socializing sequence. You can only retrieve it after the cutscene event, on your way to fight Jenova. Also, there is a chest in the boss room that contains a weapon for Yuffie. We skipped both of these things, and we really shouldn't have. Chat decides to intentionally suicide outside costa del sol and redo the end of the boat sequence to retrieve the missed items. Intentional deaths would become a recurring event throughout the run, as this was the only way to load a save. For Jenova round 2, Yuffie occupied her pretty much permanent third slot for the first time. She would take a little bit to come online, but it was worth putting work into her now. Once again, Aeris carries the fight and we return to our sunny vacation.
Costa Del Sol
We've reached the second continent at last, nearly three hours since first departing. We have also crossed the 48 hour mark since the journey began. After a quick step outside for a very much needed save, we briefly explore town and stock up items. Critically we load up on phoenix downs, death comes swift and often this run and we do not have revive magic. We neglected weapon or armor upgrades, most of our gear was still pretty good and we would have better options before anything truly difficult occurred. We were slightly overleveled for this point in the game, and it's hard to understate how powerful Aeris is. Most people really don't utilize her well. After watching Hojo get a tan while wearing a labcoat and kicking the ball at our party's resident kitty, we say goodbye to the happiest town in the game and journey onwards, through the mountain pass to North Corel.
There are several good items in the Mt Corel pass, but getting some of them proved difficult with our input limitations. In order to catch the proper path while falling from the railway, you have to hold left or right while mashing circle. Hold inputs like that aren't possible in anarchy, and democracy would probably be too delayed. We even tried to reload the screen in the hopes we could get more attempts at the falling minigame but it was not to be. These items were not worth the time it would take to suicide, there was no guarantee we would be able to get them at all, and it wasn't required to proceed. We arrive at North Corel and finally upgrade the party's armor, along with Cloud's weapon. We're already thinking of the next roadblock ahead, and it's a doozy. But first, we must GAMBLE.
Golden Saucer

This section is quite exposition heavy, centering around Barret and his hometown that was destroyed by Shinra, setting him on his path to eco terrorism. But forget all that, we have MINIGAMES to play. We unfortunately cannot afford the lifetime ticket on this visit so we take the crummy day pass and head inside. Barret is pretty upset that we're funnin around while Seph is out there trying to destroy the planet and storms off in a huff. Naturally we take Aeris as our second party member, because we're off to meet our newest one and his boppin theme music.

After Cait Sith joins the party, we immediately dash into the Wonder Square and start hitting minigames. It had been a few hours without any real action and chat needed a break. And we wanted revenge. Incidentally, the game room at Golden Saucer was one of the biggest navigational nightmares in the game. South was oriented so far left on screen any sane person would call it west, the interaction hitboxes for the games were tiny and nearly impossible to line up, and geometry stuck out in weird ways that we constantly got caught on. It was a small price to pay for minigames though. First up, a rematch with bikes. We ended with a personal high score of 500 points.
We made the full loop, playing every minigame open to us. The one we had the most success at was also just pure RNG: 3D Battler is effectively just a game of rock paper scissors, and while we didn't beat it, it was probably our most impressive performance. Mog was chronically overfed from spamming, the basketball game required a hold press we couldn't execute, and we couldn't mash fast enough to beat even a single arm wrestler. Defeated and significantly poorer, we vowed to return and resumed the main plot. After a wholly unfair accusation and some light framing for murder, we're chucked out the moon door and into the sandbox under the saucer, Corel Prison
Corel Prison Sucks
This is the first truly hard dungeon of the game, disguised as a crummy prison town. There are tough enemies everywhere, thieves who steal your items, and you cannot leave without completing the Barret solo fight at the end, plus a mandatory chocobo race. There's an infinite hellish landscape outside you can get stuck in, filled with sandworms that will wipe just about any party at this stage in the game. Corel Prison Sucks, and our order of business is to get out of here as quickly as possible. First, we have to survive long enough to progress the story and get catJAM out of the party. He's an awesome emote, but he's probably the worst FF7 character. A decent caster but we have a far better one in Aeris. So we dash to the save point and the plot house, receiving Barret and going about figuring out how the hell we're going to do this.
The Dyne fight is HARD. This is a sticking point for a lot of casual players, especially if you haven't been keeping Barret equipped and levelled. Which we haven't. In retrospect, bringing him along from costa probably would have helped, but his level wasn't the issue as even out of party characters gain some passive XP, a catchup mechanic to keep the many forced parties from stonewalling you. Still, the problem was the mechanics of the fight itself. Dyne will get two attacks to your one, and he hits like a truck.
Another reason Dyne sucks and this whole area sucks, the boss fight is several screens away from the save, with full random encounters along the way. We had to not only kill Dyne, but make it to him alive. Worse, the second last screen to Dyne has an exit trap all along the lefthand side of the map. Exiting that way chucks you into the desert, from there you have a 50/50 chance to exit back to the prison or continue along the sand maze, eating time and exposing us to VERY dangerous encounters. And it just so happened the input required to enter that screen, west, was the same one that would inevitably take us straight into the sandpit. We never had an encounter out there though, so we at least got lucky in that regard. Even got the pity ride from the chocobo wagon once, a scene most people probably haven't seen. It was sheer terror every time we ended up in there regardless.
So finally we come to the Dyne fight. After some depressing exposition Barret takes at least three rounds in the chest without blinking, then swings for the fences at his former friend. This was expected to be difficult. Worse, our first attempt went in with an accidentally naked Barret. This fight went about as well as you'd expect and was basically a scrubbed run to test our DPS against his. Numbers didn't look great. We would end up stealing Cloud's precious restore materia for Barret, as our other restore was out of the party and would require either a lot of PHS shuffling or risking the exchange menu to retrieve.
As a side note, the exchange submenu is extremely powerful for materia management, but also prone to abuse. A few wrong inputs could strip or scramble the party's materia, and setting them back up would take ages. Worse, the menu that contains the exchange option also contains the trash option for deleting materia. Deleting the wrong materia would have made parts of this run impossible. We were rightfully terrified of going anywhere near it. Exchange was used probably less than a dozen times throughout the run.
Dyne would eventually fall of course, but the management required was extreme. Compensating for input delay was key. You had to predict when your inputs would land, and try to remember the sequence necessary. Other times you would be forced to wait for the input to register, to insure you are on the right screen or target. This pause gave windows for malicious or even well intentioned inputs. Even the TPPsim bot trolled on many occasions by spitting random inputs at us. Learning to compensate and work around these things was another challenge and skill developed over the run.
The first proper attempt at Dyne still ended in failure, proving our fears to be founded. Even with careful management, due to Dyne's ridiculous speed we had a very narrow window to time heals. Our only option was to spam limit breaks and heal very conservatively, almost every other turn. Round two didn't go much better. Finally on round 3, careful and patient play rewarded us with a clear. Maybe besides Reno, this was our hardest boss to date.
A little over two hours after entering Golden Saucer, we had cleared Corel Prison. But we're not quite out of the sandbox yet. We have to race chocobos for our freedom, and win first place. Chat braces for what many expect to be another powerful roadblock. Hope people are enjoying these updates. I'm not exactly a professional, I've honestly never done anything like this before. I'll keep writing regardless, once my hands stop hurting.

PART 1 - **NEW** PART 1.1 - PART 1.2 - PART 1.3 - PART 2 - PART 3 - PART 4 - PART 5 - PART 6 - PART 7 - PART 8 - PART 9 - PART 10 - PART 11 - PART 12 - PART 13 - PART 14 - PART 15 - PART 16 - PART 17 - PART 18 - PART 19 FINALE
Log in to comment